This is my last post here at Code Rant. From now I will be posting at mikehadlow.com. I've written a post on my new blog here explaining the reasons. Thanks for visiting Code Rant and please take a moment to look at my new blog.
Tuesday, July 06, 2021
Monday, August 31, 2020
C# preprocessor directive symbols from the dotnet build command line via DefineConstants
Invoking the C# compiler directly allows one to pass in symbols for the preprocessor via a command option (-define or -d). But it's not at all obvious how to do this with the dotnet build command. There is no 'define' flag, so how do you do it?
Let me first show you how this works using the C# compiler directly:
Create a new file 'Program.cs' with this code:
using System;

namespace CscTest
{
    class Program
    {
        static void Main(string[] args)
        {
#if FOO
            Console.WriteLine("Hello FOO!");
#else
            Console.WriteLine("NOT FOO!");
#endif
        }
    }
}
Now compile it with CSC:
>csc -d:FOO Program.cs
And run it:
>Program
Hello FOO!
Happy days.
It is possible to do the same thing with dotnet build, it relies on populating the MSBuild DefineConstants property, but unfortunately one is not allowed to access this directly from the command line:
If you invoke this command:
dotnet build -v:diag -p:DefineConstants=FOO myproj.csproj
It has no effect, and somewhere deep in the diagnostic output you will find this line:
The "DefineConstants" property is a global property, and cannot be modified.
Instead one has to employ a little indirection. In your csproj file it is possible to populate DefineConstants. Create a project file, say 'CscTest.csproj', with a DefineConstants PropertyGroup element with the value FOO:
<Project Sdk="Microsoft.NET.Sdk">

  <PropertyGroup>
    <OutputType>Exe</OutputType>
    <TargetFramework>netcoreapp3.1</TargetFramework>
    <DefineConstants>FOO</DefineConstants>
  </PropertyGroup>

</Project>
Build and run it with dotnet run:
>dotnet run .
Hello FOO!
The csproj file is somewhat like a template, one can pass in arbitrary properties using the -p flag, so we can replace our hard coded FOO in DefineConstants with a property placeholder:
<Project Sdk="Microsoft.NET.Sdk">

  <PropertyGroup>
    <OutputType>Exe</OutputType>
    <TargetFramework>netcoreapp3.1</TargetFramework>
    <DefineConstants>$(MyOption)</DefineConstants>
  </PropertyGroup>

</Project>
And pass in FOO (or not) on the command line. Unfortunately it now means building and running as two individual steps:
>dotnet build -p:MyOption=FOO .
...
>dotnet run --no-build
Hello FOO!
And all is well with the world. It would be nice if the MSBuild team allowed preprocessor symbols to be added directly from the command line though.
Tuesday, August 04, 2020
Restoring from an Azure Artifacts NuGet feed from inside a Docker Build
If you are using Azure DevOps pipelines to automate building your .NET Core application Docker images, it's natural to also want to use the DevOps Artifacts NuGet feed for your internally hosted NuGet packages. Unfortunately there is much confusion and misinformation about how to authenticate against the Artifacts NuGet feed. While researching this topic I found various sources saying that you needed to install the NuGet credential provider as part of the docker build, and then set various environment variables. I followed this route (excerpt from an example below), even to the extent of creating a custom Docker image for all our dotnet builds with the credential provider already installed.
ARG PAT
RUN wget -qO- https://raw.githubusercontent.com/Microsoft/artifacts-credprovider/master/helpers/installcredprovider.sh | bash
ENV NUGET_CREDENTIALPROVIDER_SESSIONTOKENCACHE_ENABLED true
ENV VSS_NUGET_EXTERNAL_FEED_ENDPOINTS “{\”endpointCredentials\”: [{\”endpoint\”:\”https://pkgs.dev.azure.com/jakob/_packaging/DockerBuilds/nuget/v3/index.json\”, \”password\”:\”${PAT}\”}]}”
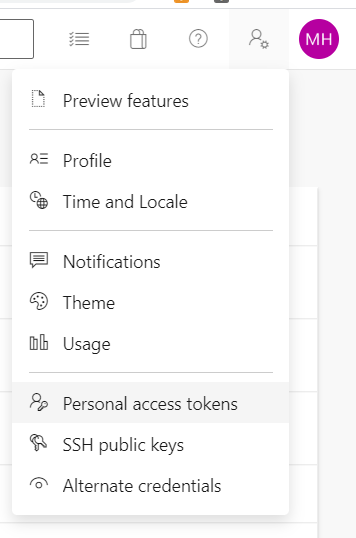
The technique is to install the credential provider, then configure it with the DevOps Artifacts endpoint and a Personal Access Token (PAT), which you can generate by going to your user settings from the DevOps UI:

After wasting over a day on this, I was then very surprised indeed to find that a colleague was restoring from the same DevOps Artifacts feed on a locally hosted TeamCity server, simply by providing the PAT as the NuGet API-Key! They hadn't installed the NuGet credential provider, so according to the Microsoft documentation it shouldn't work?
I tried it myself. The PAT does indeed work as a NuGet API-Key. A slight further complication is that the 'dotnet restore' command doesn't have an API-Key switch, so the next easiest thing is to simply use a nuget.config file as follows:
<?xml version="1.0" encoding="utf-8"?>
<configuration>

    <packageSources>
        <add key="DevOpsArtifactsFeed" value="your-devops-artifacts-nuget-source-URL" />
    </packageSources>

    <packageSourceCredentials>
        <DevOpsArtifactsFeed>
            <add key="Username" value="foo" />
            <add key="ClearTextPassword" value="your-PAT" />
        </DevOpsArtifactsFeed>
    </packageSourceCredentials>

</configuration>
Replace the place-holders with your Artifacts NuGet feed URL and your PAT. The Username is not considered by Artifacts feed and can be any string. Copy the above configuration into a file named 'nuget.config' and run create a Dockerfile like this:
FROM mcr.microsoft.com/dotnet/core/sdk:3.1 AS build

WORKDIR /app

# copy source code, nuget.config file should be placed in the 'src' directory for this to work.
COPY src/ .

# restore nuget packages
RUN dotnet restore --configfile nuget.config

# build
RUN dotnet build

# publish
RUN dotnet publish -o output

# build runtime image
FROM mcr.microsoft.com/dotnet/core/runtime:3.1 AS runtime
WORKDIR /app
COPY --from=build /app/output/ ./
#
ENTRYPOINT ["your/entry/point"]
This is the simplest thing that will possibly work. But you really shouldn't hard code secrets such as your PAT into your source control system. Very conveniently, the dotnet restore command will do environment variable replacement in the nuget.config file, so you can replace your hard-coded PAT with a reference to an ENV var and then pass that to docker build:
In your nuget.config file:
    <packageSourceCredentials>
        <DevOpsArtifactsFeed>
            <add key="Username" value="foo" />
            <add key="ClearTextPassword" value="%NUGET_PAT%" />
        </DevOpsArtifactsFeed>
    </packageSourceCredentials>
In your Dockerfile:
ARG NUGET_PAT
ENV NUGET_PAT=$NUGET_PAT
Your docker build command:
docker build -t my-image --build-arg NUGET_PAT="your PAT" .
I hope this short post saves somebody from the many hours that I wasted on this. I also hope that Microsoft updates their documentation!
Wednesday, April 15, 2020
A Framework to DotNet Core Conversion Report
An experience report of converting a large microservice platform from .NET Framework to dotnet core.
Background
For the last year or so I’ve been working with company that maintains a significant trading platform built in .NET. The architecture consists of a number of Windows Service components that communicate using RabbitMQ with EasyNetQ. These are all backend components that at the top level communicate with various clients via a web API maintained by a different team. The infrastructure is hosted in the company’s own data center with a CI/CD software process featuring BitBucket, Team City, and Octopus, a pretty standard .NET delivery pipeline.
Motivation
Our motivation for porting to dotnet core was essentially twofold: to keep the technology platform up to date, and to be in a position to exploit new developments in application platforms, specifically to take advantage of container technology, such as Docker, and container orchestrators, such as Kubernetes.
Microsoft is, on the whole, very good at supporting their technology for the long term; there are many companies with VB6 applications still running, for example, and the .NET Framework will undoubtedly be supported on Windows for years to come. However there are significant costs and risks in supporting legacy software platforms, such as: difficulty in using newer technologies and protocols because libraries aren’t available for the legacy platform; difficulty hiring and retaining technology staff who will fear that their skills are not keeping up to date with the market; and the increasing cost over time of porting to a newer platform as year on year the gap with the legacy technology widens. There is a danger that at some point in the future the legacy platform will become unsupportable, but the technology gap is so wide that the only feasable solution is a very expensive re-write.
Software infrastructure has experienced a revolution in the last few years. I’ve written before why I think that containerization is a game changer, especially for distributed microservice architectures such as ours. It has the potential to significantly reduce risks and costs and increase flexibility. For all Microsoft’s efforts, Windows containers are still a platform that one should use with caution; all the maturity is with Linux containers. We are very keen to exploit the opportunities of Docker and Kubernetes, and so this has a prerequisite that our software can run on Linux. It provides the second strong incentive for our move to dotnet core.
Process
Analysis
A dotnet core application can only consume dotnet core or dotnet standard dependencies, so the first task is to understand the dependency tree; what are the projects, NuGet packages, and system assemblies that the application relies upon, and which assemblies do these rely on in turn. Once we have that picture, we can work from the leafs down to the trunk; from the top-level dependencies down to the application itself. For third party NuGet packages we have to make sure that a dotnet standard version is available. For libraries internal to the organisation, we have to add each one to our list of projects that we will need to convert to dotnet standard.
I used my own tool: AsmSpy to help with this. It was originally designed to report on assembly version conflicts, but since it already built an internal dependency graph, it was a relatively simple extension to add a visualizer to output the graph as a tree view. To do this, simply add the
-tr option:asmspy.exe <path to application executable> -tr
At the end of the analysis process, we should have a list of NuGet packages to be checked for dotnet standard versions, our internal libraries that need to be converted to dotnet core, and our applications/services that need to be converted to dotnet core. We didn’t have any problems with base class libraries or frameworks because our services are all console executables that communicate via EasyNetQ, so the BCL footprint was very light. Of course you will have a different experience if your application uses something like WCF.
Converting Projects to dotnet Standard and Core
Some early experiments we tried with converting .NET Frameworks to dotnet Standard or Core in place, by modifying the
.csproj files, did not go well, so we soon settled on the practice of creating entirely new solutions and projects and simply copying the .cs files across. For this Git Worktree is your very good friend. Worktree allows you to create a new branch with a new working tree in a separate directory, so you can maintain both your main branch (master for example), and your conversion branch side by side. The project conversion process looks something like this:- Create a new branch in a new worktree with the worktree command:
git worktree add -b core-conversion <path to new working directory> - In the new branch open the solution in Visual Studio and remove all the projects.
- Delete all the project files using explorer or the command line.
- Create new projects, copying the names of the old projects, but using the dotnet Standard project type for libraries, ‘Class Library (.NET Standard)’, and the dotnet Core project type for services and applications. In our case all the services were created as ‘Console App (.NET Core)’. For unit tests we used ‘xUnit Test Project (.NET Core)’, or ‘MSTest Test Project (.NET Core)’, depending on the source project test framework.
- From our analysis (above), add the project references and NuGet packages required by each project.
- Copy the .cs files only from the old projects to the new projects. An interesting little issue we found was that old .cs files were still in the repository despite being removed from their projects. .NET Framework projects enumerate each file by name (the source of many a problematic merge conflict) but Core and Standard projects simply use a wildcard to include every .cs file in the project directory, so a compile would include these previously deleted files and cause build problems. Easily fixed by deleting the rogue files.
- Once all this is done the solution should build and the tests should all pass.
- NuGet package information is now maintained in the project file itself, so for your libraries you will need to copy that from your old
.nuspecfiles. - One you are happy that the application is working as expected, merge your changes back into your main branch.
You have now successfully converted your projects from .NET Framework to dotnet core and standard. Read on if you want to take advantages of the new dotnet Core frameworks available, and for ideas about build and deployment pipelines.
Taking advantage of new dotnet core frameworks
At this point we need to make a strategic decision about how far we want to take advantage of the new hosting, dependency-injection, configuration, and logging frameworks that now come out-of-the-box with dotnet core. We may decide that we will simply use standard versions of all our existing frameworks. In our case we had: TopShelf for windows service hosting, Ninject for DI, System.Configuration for configuration, and log4net and NLog for logging, but we decided to replace all these with their Generic Host equivalents from the
Microsoft.Extensions.* namespaces.| Framework NuGet Package | Microsoft.Extensions.* equivalent |
|---|---|
| TopShelf | Microsoft.Extensions.Hosting.WindowsServices |
| Ninject | Microsoft.Extensions.DependencyInjection |
| System.Configuration | Microsoft.Extensions.Configuration |
| log4net | Microsoft.Extensions.Logging |
The APIs of the existing 3rd party frameworks differ from the equivalent
Microsoft.Extensions.* frameworks, so some refactoring is required to replace these. In the case of TopShelf and Ninject, the scope of this refactoring is limited; largely to the Program.cs file and the main service class for TopShelf, and to the NinjectModules where service registration occurs for Ninject. This makes it relatively painless to do the substitution. With Ninject, the main issue is the limited feature set of Microsoft.Extensions.DependencyInjection. If you make widespread use of advanced container features, you’ll find yourself writing a lot of new code to make the same patterns work. Most of our registrations were pretty straightforward to convert.
Replacing
log4net with Microsoft.Extensions.Logging is a bit more of a challenge since references to log4net, especially the ILog class and its methods, were spread liberally throughout our codebase. Here we found that the best refactoring method was to let the type system do the heavy lifting, using the following steps:- Uninstall the
log4netNuGet package. The build will fail with many missing class and method exceptions. - Create a new interface named
ILogwith namespacelog4net, now the build will fail with just missing method exceptions. - Add methods to your
Iloginterface to match the missinglog4netmethods (for examplevoid Info(object message);) until you get a clean build. - Now use Visual Studio’s rename symbol refactoring to change your
ILoginterface to match theMicrosoft.Extensions.LoggingILoggerinterface and its methods to matchILogger's methods. For example renamevoid Info(object message);tovoid LogInformation(string message);. - Rename the namespace from
log4nettoMicrosoft.Extensions.Logging. This is a two step process because you can’t use rename symbol to turn one symbol into three, so renamelog4netto some unique string, then use find and replace to change it toMicrosoft.Extensions.Logging. - Finally delete your interface .cs file, and assuming you’ve already added the
Microsoft.Extensions.HostingNuGet package and its dependencies (which include logging), everything should build and work as expected.
Configuration is another challenge. Gone are our old friends
App.config and System.Configuration.ConfigurationManager to be replaced with a new configuration framework, Microsoft.Extensions.Configuration. This is far more flexible and can load configuration from various sources, including JSON files, environment variables, and command line arguments. We replaced our App.config files with appsettings.json, and refactored our attributed configuration classes into POCOs and used the IConfigurationSection.Bind<T>(..) method to load the config. An easier and more streamlined process than the clunky early 2000’s era System.Configuration. At a later date we will probably move to loading environment specific configuration from environment variables to better align with the Docker/k8s way of doing things.Changes to our build and deployment pipeline
As I mentioned above, we use a very common combination of BitBucket, Team City, and Octopus to host our build and deployment pipeline. We follow a continuous delivery style deployment process. Any commit to a BitBucket Git repository immediately triggers a build, test and package process in Team City, which in turn triggers Octopus to deploy the package to our development environment. We then have to manually use the Octopus UI to release to first our QA environment and then to Production. Although our ultimate aim, and a prime motivation for the transition to Core, is to move to Docker and Kubernetes, we needed to be able to build and deploy using our existing tooling for the time being. This proved to be pretty straightforward. The changes were in three main areas:
- Using the
dotnettool: The build and test process changed from using NuGet, MSBuild and xUnit, to having every step, except the Octopus trigger, run with thedotnettool. This simplifies the process. One very convenient change is how easy it is to version the build with the command line switch/p:Version=%build.number%. We also took advantage of the self-contained feature to free us from having to ensure that each deployment target had the correct version of Core installed. This is a great advantage. - JSON configuration variables: We previously used the Octopus variable substitution feature to inject environment specific values into our
App.configfiles. This involved annotating the config file with Octopus substitution variables, a rather fiddly and error prone process. But now with the newappsettings.jsonfile we can use the convenient JSON configuration variable feature to do the replacement, with no need for any Octopus specific annotation in our config file. - Windows service installation and startup: Previously, with TopShelf, installing our windows services on target machines was a simple case of calling
ourservice.exe installandourservice.exe startto start it. Although theMicrosoft.Extensions.Hostingframework provides hooks into the Windows service start and stop events, it doesn’t provide any facilities to install or start the service itself, so we had to write somewhat complex powershell scripts to invokeSC.exeto do the installation and the powershellStart-Servicecommand to start. This is definitely a step backward.
Observations
The conversion of our entire suite of services from .NET Framework to Core turned out to be a bigger job than we at first expected. This was mainly because we took the opportunity to update our libraries and services to replace our 3rd party NuGet packages with the new
Microsoft.Extensions.* frameworks. This was a significant refactoring effort. Doing a thorough analysis of your project and its dependencies before embarking on the conversion is essential. With large scale distributed applications such as ours, it’s often surprising how deep the organisations internal dependency graph goes, especially if, like me, you are converting large codebases which you didn’t have any input into writing. With the actual project conversion I would highly recommend starting with new projects rather than trying to convert them in place. This turned out to be a far more reliable method.
DotNet Core is a complete ground up reinvention of the .NET tooling and frameworks, and the 20 year difference shows in many places. The tooling is modern, as are the frameworks, and although there’s plenty to argue about with the individual decisions the team have made, on the whole it’s a large step forward. This was apparent in many ways during the conversion process, with many things be simpler and easier than with the old .NET Framework. Having the entire SDK surficed through a single command line tool (the
dotnet command), making automated build processes so much easier, is probably the most prominent example. I for one am very pleased we were able to take the effort to make the change.Tuesday, January 29, 2019
Why Containers are a Game Changer for Software Development
I originally wrote this piece as of part of a paper evaluating container technology for a client.
This document describes container technology, best represented by Docker. Containerization is a game changing technology that’s experiencing rapid adoption. Some measures have around 25% of companies now using Docker in some form (https://www.datadoghq.com/docker-adoption/). Containers can dramatically simplify the software development process, allowing companies to be more agile and lower the cost of building and maintaining large software systems. This document looks at how containers fit within the general evolution of software systems.
A brief history of software
The history of software development is a story of successive rounds of abstraction and commodification. If you can treat a class of something (a computer, a network or a peripheral) as a black box with a consistent API, it enables common industry wide tooling and commodification.
In the early years of computing software was written for a particular version of hardware. Each program would would take complete control of the machine, use the processor’s physical instruction set, directly address physical memory and have intimate knowledge of the locations and capabilities of any devices attached to the machine. This meant that a program written for one model of machine would not work on a different model. Machines were typically sold with a dedicated software suite, which meant that the same classes of software had to be written repeatedly for each machine. In the early days of home computers it was typical for a word processor, for example, to come in different versions for all the major machines on the market and with drivers for a range of popular printers. If your printer wasn’t included it wouldn’t work.
To solve this problem and allow a single program to run on a variety of machines, operating systems were created to provide an abstraction layer over the underlying hardware. So long as a piece of software was designed to run on the operating system of your computer, it worked. The operating system also isolated the program from variations in peripheral hardware. You no longer had to care about what particular printer was attached to the computer because an operating system driver provided a common abstract printer API regardless of the actual hardware model. As operating systems evolved they provided not only isolation from the hardware, but also isolation from other programs running on the same computer with innovations such as protected memory and pre-emptive multitasking. With the adoption of an operating system as a common platform, the thing it abstracted, the hardware, became a commodity. This lead to dramatic cost reductions and economies of scale, both for hardware and software.
The same adoption and standardisation also occurred with networking. TCP/IP became the standard which allowed computer systems to be connected world wide and HTTP has become a standard for sharing data globally. This has allowed software solutions to serve customers at a massive scale.
As software that runs on commodified platforms became more complex, various mechanisms evolved to make software more modular and reusable. Collections of modular software ‘libraries’ could be brought together to create more powerful applications in less time. Software environments also evolved to include runtimes to relieve programmers from the need to manage memory and to further abstract the program from its environment. Software systems also evolved to be composed of multiple processes running on multiple machines to better aid scalability and resilience. Various services and infrastructure tools such as web servers and databases provided off-the-shelf capabilities to further aid software development.
The complexity of the modern software environment
All these libraries, services and infrastructure have to be correctly configured for the software to run. This is often a semi-manual, complex, time consuming and error prone task. When multiple pieces of software run on a single machine there can often be complex and damaging interactions between conflicting library and tool versions. The complexity of provisioning environments, installing tools and libraries of the correct version, opening the correct ports and configuring connections, especially when this is done in different environments with differing network topologies, a fertile environment for human error.
Once in production, these complex systems need to be monitored, managed and audited. This introduces additional tooling and configuration, adding yet another vector for misconfiguration and error.
Also the difficulty of coordinating teams of software developers who create complex software systems requires the formalisation and automation of the software development process. This introduces new tools, such as build and deployment systems that must also be configured correctly for the software to be successfully delivered into production. This configuration work is also often manual, fragile and error prone, and since a single toolset is often shared by many teams and components, it creates significant friction when introducing new services, libraries or tools.
Because the delivery and runtime environments are maintained and versioned separately from source code, this introduces risk and friction. Services often share both environments and delivery processes, meaning that upgrades and changes have to be coordinated. In a worse-case scenario separate teams may be tasked with maintaining the runtime infrastructure and the delivery process, escalating any change to a large scale organisational issue. Often the overwhelming task of synchronising software and environment upgrades means that they are done infrequently and with a great deal of ceremony and risk.
Virtual machines don’t really help here. They can make the work of technical operations easier; they decouple an entire operating system environment from hardware and make it easy to replicate and move environments around hardware infrastructure. However, VMs make very little difference to software developers. The software pipeline and runtime environment is still maintained and configured separately from the the software source code itself.
The stage has been set for another round of abstraction, this time the abstraction is the interface between the operating system, the userland environment and the network topology that the software is built and runs within.
Containerisation is the technology that provides this abstraction and solves many of the problems described above. Containers provide a scripted per-process runtime user environment that is maintained alongside the source code. The software build process and target network topology of a large software system is also defined in container and composition/orchestration scripts. Because the scripts are maintained by developers on a per-process (per service) basis and are maintained under source control alongside the service’s source code, the software describes the environment that builds it and that it runs in, and this description is versioned with the software. Effectively it reverses the usual hierarchy and allows each component to own it’s environment and delivery process. The environment for a component is identical regardless of whether it’s running on the developer’s machine, in a test environment or in production and removes much of the risk of configuring the software pipeline and runtime environment described above. This idea of extending Git workflow to operations is known as GitOps. (see https://www.weave.works/blog/what-is-gitops-really). In the same way that operating systems removed the need for software to care about hardware, so containers allow the software environment to be described without having to know or care about the specific operating system environment and the physical network.
Conclusion
Docker and its various orchestration options offer game changing performance increases for large software organisations. It provides a single, integrated, scripted, scalable platform for both the software delivery pipeline and production operations. It’s experiencing fast adoption and will soon be as standard a part of IT infrastructure as VMs are currently. Any software organisation of reasonable scale should now be seriously looking at a path for adoption.
Tuesday, November 06, 2018
Decoupling, Architecture and Teams
This article discusses the relationship in software development between code organisation and social organisation. I discuss why software and teams do not scale easily, lessons we can learn from biology and the internet, and show how we can decouple software and teams to overcome scaling problems.
The discussion is based on my 20 years experience of building large software systems, but I’ve also been very impressed with the book Accelerate: The Science of Lean Software and DevOps: Building and Scaling High Performing Technology Organizations by Nicole Forsgren, Jez Humble and Gene Kim, which provides research data to back up most of the assertions that I make here. It’s a highly recommended read.

Software and software teams do not scale.
It’s a very common story, the first release of a product, perhaps written by one or two people, often seems remarkably easy. It might only provide limited functionality, but it is written quickly and fulfils the customer’s requirements. Customer communication is great because the customer is usually in direct communication with the developers. Any defects are quickly fixed and new features can be added quite painlessly. After a while though the pace slows. Version 2.0 takes a little longer than expected, it’s harder to fix bugs and new features don’t seem to come out quite so easily. The natural response to this is to add new developers to the team, yet each extra person added to the team seems to reduce productivity. As the software ages and grows in complexity it appears to atrophy. In extreme cases, organizations can find themselves running on software that’s hugely expensive to maintain and that it seems almost impossible to change. There are negative scale effects. The problem is that you don’t have to make ‘mistakes’ for this to happen, it’s so common that one could almost say that it’s a ‘natural’ property of software.
Why is this? There are two reasons, code related and team related. Neither code nor teams scale well.
As a codebase grows, it becomes harder for a single person to understand. There are fixed human cognitive limits and while it is possible for a single individual to maintain a mental model of the details of a small system, once it gets past a certain size, it grows larger than the cognitive range of a single person. Once a team grows past five or more people it’s almost impossible for one person to stay up to speed with how all parts of the system work. When no one person understands the complete system, fear reigns. In a tightly coupled large system it’s very hard to know the impact of any significant change since the consequences are not localised. Developers learn to work in a minimum-impact style of work-arounds and duplication rather than factoring out commonalities and creating abstractions and generalisations. This feeds back into system complexity, further amplifying these negative trends. Developers stop feeling any ownership of code they don’t really understand and are reluctant to refactor. Technical debt increases. It also makes for unpleasant and unsatisfying work and encourages ‘talent evaporation’, where the best developers, those who can more easily find work elsewhere, move on.
Teams also don’t scale. As the team grows, communication gets harder. The simple network formula comes into play:
c = n(n-1)/2
(where n is the number of people and c is the number of communication channels)
| Number of team members | Number of communication channels |
| 1 | 0 |
| 2 | 1 |
| 5 | 10 |
| 10 | 45 |
| 100 | 4950 |
The communication and coordination needs of the team rise geometrically as the team size increases. It’s very hard for a single team to stay a coherent entity over a certain size and the natural human social tendency to split into smaller groups will lead to informal sub-groups forming even if there is no management input. Peer level communication becomes difficult and will naturally be replaced by emergent leaders and top-down communication. Team members change from being equal stakeholders in the system to directed workers. Motivation suffers and there is a lack ownership driven by the diffusion of responsibility effect.
Management often intervenes at this stage and formalises the creation of new teams and management structures to organize them. But whether formal or informal, larger organisations find it hard to keep people motivated and actively engaged.
It’s typical to blame poorly skilled developers and bad management for these scaling pathologies, but that’s unfair, scale issues are a ‘natural’ property of growing and aging software, it’s what always happens unless you spot the problem early, recognise the inflexion point and work very hard to mitigate it. Software teams are constantly being created, the amount of software in the world is constantly growing and most software is small scale, so it’s quite common for a successful and growing product to have been created by a team that has no experience of large-scale software development. Expecting them recognise the inflexion point when the scale issues start to bite and to know what to do about it is unrealistic.
Scaling lessons from nature
I recently read Geoffrey West’s excellent book Scale. He talks about the mathematics of scale in biological and social-economic systems. His thesis is that all large complex systems obey fundamental scaling laws. It’s a fascinating read and very much recommended. For the purposes of this discussion I want to focus on his point that many biological and social systems scale amazingly well. Take the basic mammal body plan. We share the same cell types, bone structure, nervous and circulatory system of all mammals. Yet the difference in size between a mouse and a blue whale is around 10^7. How does nature use the same fundamental materials and plans for organisms of such hugely different scales? The answer appears to be that evolution has discovered fractal branching networks. This can be seen quite obviously if you consider a tree. Each small part of the tree looks like a small tree. The same is true for our mammalian circulatory and nervous systems, they are branching fractal networks where a small part of your lungs or blood vessels looks like a scaled down version of the whole.

Can we take these ideas from nature and apply them to software? I think there are important lessons that we can learn. If we can build large systems which have smaller pieces that look like complete systems themselves, then it might be possible to contain the pathologies that affect most software as it grows and ages.
Are there existing software systems that scale many orders of magnitude successfully? The obvious answer is the internet, a global software system of millions of nodes. Subnets do indeed look and work like smaller versions of the whole internet.
Attributes of decoupled software.
The ability to decouple software components from the larger system is the core technique for successful scaling. The internet is fundamentally a decoupled software architecture. This means that each node, service or application on the network has the following properties:
-
Obeys a shared communication protocol.
-
Only shares state via a clear contract with other nodes.
-
Does not require implementation knowledge to communicate.
-
Versioned and deployed independently.
The internet scales because it is a network of nodes that communicate over a set of clearly defined protocols. The nodes only share their state via the protocol, the implementation details of one node do not need to be understood by the nodes communicating with it. The global internet is not deployed as a single system, each node is separately versioned and deployed. Individual nodes come and go independently of each other. Obeying the internet protocol is the only thing that really matters for the system as a whole. Who built each node, when is created or deleted, how it’s versioned, what particular technologies and platforms it uses are all irrelevant to the internet as a whole. This is what we mean by decoupled software.
Attributes of decoupled teams.
We can scale teams by following the similar principles:
-
Each sub-team should look like a complete small software organization.
-
The internal processes and communication of the team should not be a concern outside the team.
-
How the team implements software should not be important outside the team.
-
Teams should communicate with the wider organisation about external concerns: common protocols, features, service levels and resourcing.
Small software teams are more efficient than large ones, so we should break large teams into smaller groups. The lesson from nature and the internet is that the sub-teams should look like a single, small software organisations. How small? Ideally one to five individuals.
The point that each team should look like a small independent software organisation is important. Other ways of structuring teams are less effective. It’s often tempting to split up a large team by function, so we have a team of architects, a team of developers, a team of DBAs, a team of testers, a deployment team and an operations team, but this solves none of the scaling problems we talked about above. A single feature needs to be touched by every team, often in an iterative fashion if you want to avoid waterfall style project management - which you do. The communication boundaries between these functional teams become a major obstacle to effective and timely delivery. The teams are not decoupled because they need to share significant internal details in order to work together. Also the interests of the different teams are not aligned: The development team is usually rewarded for feature delivery, the test team for quality, the support team for stability. These different interests can lead to conflict and poor delivery. Why should the development team care about logging if they never have to read the logs? Why should the test team care about delivery when they are rewarded for quality?
Instead we should organise teams by decoupled software services that support a business function, or a logical group of features. Each sub-team should design, code, test, deploy and support their own software. The individual team members are far more likely to be generalists than specialists because a small team will need to share these roles. They should focus on automating as much of the process as possible: automated tests, deployment and monitoring. Teams should choose their own tools and decide for themselves how to architect their systems. While the organizational protocols that the system uses to communicate must be decided at an organization level, the choice of tools used to implement the services should be delegated to the teams. This very much aligns with a DevOps model of software organization.
The level of autonomy that a team has is a reflection of the level of decoupling from the wider organization. Ideally the organization should care about the features, and ultimately business value, that the team provides, and the cost of resourcing the team.
The role of the software architect is important in this style of organisation. They should not focus on the specific tools and techniques that teams use, or micro-manage the internal architecture of the services, instead they should concentrate on the protocols and interactions between the various services and the health of the system as a whole.
Inverse Conway: software organisation should model the target architecture.
How do decoupled software and decoupled teams align? Conway’s Law states that:
"organizations which design systems ... are constrained to produce designs which are copies of the communication structures of these organizations."
This is based on the observation that the architecture of a software system will reflect the team structure of the organization that creates it. We can ‘hack’ Conway’s law by inverting it; organize our teams to reflect our desired architecture. With this in mind we should align our decoupled teams with our decoupled software components. Should this be a one-to-one relationship? I think this is ideal, although it seems that it’s fine for a single small team to deliver several decoupled software services. I would argue that the scaling inflexion point for teams is larger than that for software, so this style of organisation seems valid. However, it’s important that the software components should remain segregated with their own version and deployment story even if some share the same team. We would like to be able to split the team if it grows too large, and being able to hand off various services to different teams would be a major benefit. We can’t do that if the services are tightly coupled or share process, versioning or deployment.
We should avoid having multiple teams work on the same components, this is an anti-pattern and is in some ways worse than having a single large team working on an oversize single codebase because the communication barriers between the teams leads to even worse feelings of lack-of-ownership and control.

The communication requirements between decoupled teams building decoupled software are minimised. Taking the example of the internet again, it’s often possible to use an API provided by another company without any direct communication if the process is simple and documentation sufficient. The communication should not require any discussion of software process or implementation, that is internal to the team, instead communication should be about delivering features, service levels, and resourcing.
An organisation of decoupled software teams building decoupled software should be easier to manage than the alternatives. The larger organization should focus on giving the teams clear goals and requirements in terms of features and service levels. The resource requirements should come from the team, but can be used by the organization to measure return on investment.
Decoupled Teams Building Decoupled Software
Decoupling software and teams is key to building a high performance software organisation. My anecdotal experience supports this view. I’ve worked in organisations where teams were segregated by software function or software layer or even where they’ve been segregated by customer. I’ve also worked in chaotic large teams on a single codebase. All of these suffer from the scaling problems discussed above. The happiest experiences were always where my team was a complete software unit independently building, testing and deploying decoupled services. But you don’t have to rely on my anecdotal evidence, the book Accelerate (described above), has survey data to support this view.
Monday, October 01, 2018
Visual Programming - Why it’s a Bad Idea

Note. This post had a great response on Reddit with over 300 comments. I’ve added an update section to the end of this post to address some of the main criticisms.
A visual programming language is one that allows the programmer to create programs by manipulating graphical elements rather than typing textual commands. A well known example is Scratch, a visual programming language from MIT that’s used to teach children. The advantages given are that they make programming more accessible to novices and non-programmers. There was a very popular movement in the 1990’s to bring these kinds of tools into the enterprise with so called CASE tools, where enterprise systems could be defined with UML and generated without the need for trained software developers. This involved the concept of ‘round tripping’, where a system could be modelled visually, the program code would be generated from the models, and any changes to the code could be pushed back to the model. These tools failed to deliver on their promises and most of these attempts have now been largely abandoned.
So visual programming has failed to catch on, except in some very limited domains. This is fundamentally attributable to the following misconceptions about programming:
- Textual programming languages obfuscate what is essentially a simple process.
- Abstraction and decoupling play a small and peripheral part in programming.
- The tools that have been developed to support programming are unimportant.
The first misconception holds that software development has significant barriers to entry because textual programming languages obfuscate the true nature of programming. The popularity of Scratch among educationalists plays to this misconception. The idea is that programming is actually quite simple and if we could only present it in a clear graphical format it would dramatically lower the learning curve and mental effort required to create and read software. I expect this misconception comes from a failure to actually read a typical program written in a standard textual programming language and imagine it transformed into graphical elements of boxes and arrows. If you do this it soon becomes apparent that a single line of code often maps to several boxes and since it’s not untypical for even a simple program to contain hundreds of lines of code, this translates into hundreds or even thousands of graphical elements. The effort to mentally parse such a complex picture is often far harder than reading the equivalent text.
The solution for most visual programming languages is to make the ‘blocks’ represent more complex operations so that each visual element is equivalent to a large block of textual code. Visual workflow tools are a particular culprit here. The problem is that this code needs to be defined somewhere. It becomes ‘property dialogue programming’. The visual elements themselves only represent the very highest level of program flow and the majority of the work is now done in standard textual code hidden in the boxes. Now we have the worst of both worlds, textual programming unsupported by modern tooling. The properly dialogues are usually sub-standard development environments and enforce a particular choice of language, usually a scripting language of some kind. Visual elements can’t be created except by experienced programmers, or understood except by reading their underlying code, so most of the supposed advantages of the visual representation are lost. There’s an impedance mismatch between the visual ‘code’ and the textual code, and the programmer has to navigate the interface between the two, often spending more effort on conforming to the needs of the graphical programming tool than solving the problem at hand.
Which bring us to the second misconception, that abstraction and decoupling are peripheral concerns. Visual programming makes the assumption that most programs are simple procedural sequences, somewhat like a flowchart. Indeed, this is how most novice programmers imagine that software works. However, once a program gets larger than a quite trivial example, the complexity soon overwhelms the novice programmer. They find that it’s very hard to reason about a large procedural code base and often struggle to produce stable and efficient software at scale. Most of the innovation in programming languages is an attempt to manage complexity, most commonly via abstraction, encapsulation and decoupling. All the type systems and apparatus of object-oriented and functional programming is really just an effort to get this complexity under control. Most professional programmers will be continually abstracting and decoupling code. Indeed, the difference between good and bad code is essentially how well this has been done. Visual programming tools rarely have efficient mechanisms to do this and essential trap the developer in an equivalent of 1970’s BASIC.
The final misconception is that visual programmers can do without all the tools that have been developed over the decades to support programming. Consider the long evolution of code editors and IDEs. Visual Studio, for example, supports efficient intellisense allowing the look-up of thousands of APIs available in the base class library alone. The lack of good source control is another major disadvantage of most visual programming tools. Even if they persist their layout to a textual format, the diffs make little or no sense. It’s very hard to do a ‘blame’ on a large lump of XML or JSON. Things that make no difference to the functional execution of the program, such as the position and size of the graphical elements, still lead to changes in the metadata, which make it harder still to parse a diff. Textual programming languages have learnt to separate units of code into separate source files, so a change in one part of the system is easy to merge with a change in another. Visual tools will usually persist as a diagram per file which means that merges become problematic, made harder still when the semantic meaning of the diff is difficult to parse.
In conclusion, the advantages given for visual programming tools, that they make the program easier to create and understand are almost always a mirage. They can only succeed in the simplest of cases and at best result in the suboptimal situation where the visual elements are simply obfuscating containers for textual code.
Update…
I was probably wrong to use a screen-shot of Scratch and use it as the primary example in my first paragraph. I’m not an educator and I don’t really have an opinion about Scratch’s effectiveness as a teaching tool. Many people say that they find it enormously useful in teaching programming, especially to children. Anything that introduces more people to the wonderful and exciting world of programming is only to be celebrated. I really didn’t intend this post as a criticism of Scratch specifically, it was simply the visual programming system that I thought the largest number of people would have heard of.
Another counter example cited on Reddit were static structure tools, such as UI designers, database schema designers, or class designers. I agree that they can be very useful. Anything that helps to visualise the structure of data or the large scale structure of a program is a bonus. These are never enough on their own though. The ultimate failure of 90’s tools such as Power Builder that attempted to build on graphical visualisations to create a fully code-free development environment attest to this.
Friday, September 14, 2018
What I Learnt Creating Guitar Dashboard: SVG, TypeScript and Music Theory.

Guitar Dashboard is a side project I’ve been working on occasionally over the past two years. It’s an open source web application (you can find it at http://guitardashboard.com/ and the code at https://github.com/mikehadlow/gtr-cof). It’s intended as an interactive music theory explorer for guitarists that graphically links theoretical concepts, such as scales, modes and chords to the guitar fretboard. It evolved out my my own attempts, as an amateur guitarist, to get a better understanding of music theory. It includes an algorithmic music theory engine that allows arbitrarily complex scales and chords to be generated from first principles. This gives it far more flexibility than most comparable tools. Coming at music theory from the point of view of software developer, and implementing a music theory rules engine, has given me a perspective that’s somewhat different from most traditional approaches. This post outlines what I’ve learnt, technically and musically while building Guitar Dashboard. There are probably things here that are only interesting to software developers, and others only of interest to musicians, but I expect there’s a sizable group of people, like me, who fit in the intersection of that Venn diagram and who will find it interesting.
Why Guitar Dashboard?
Guitar dashboard’s core mission is to graphically and interactively integrate music theory diagrams, the chromatic-circle and circle-of-fifths, with a graphical representation of the fretboard of a stringed instrument. It emerged from my own study of scales, modes and chords over the past three or four years.
I expect like many self taught guitarists, my main aim when I first learnt to play at the age of 15 was to imitate my guitar heroes, Jimmy Page, Jimi Hendrix, Steve Howe, Alex Lifeson and others. A combination of tips from fellow guitarists, close listening to 60’s and 70’s rock cannon, and a ‘learn rock guitar’ book was enough to get me to a reasonable imitation. I learnt how to play major and minor bar chords and a pentatonic scale for solos and riffs. This took me happily through several bands in my 20s and 30s. Here’s me on stage in the 1980’s with The Decadent Herbs.

I was aware that there was a whole school of classical music theory, but it didn’t at first appear to be relevant to my rock ambitions, and any initial attempts I tried at finding out more soon came to grief on the impenetrable standard music notation and vocabulary, and the very difficult mapping of stave to fretboard. I just couldn’t be bothered with it. I knew there were major and minor scales, I could even play C major on my guitar, and I’d vaguely heard of modes and chord inversions, but that was about it. In the intervening years I’ve continued to enjoy playing guitar, except these days it’s purely for my own amusement, but I’d become somewhat bored with my limited range of musical expression. It wasn’t until around four years ago on a train ride, that a question popped into my head, “what is a ‘mode’ anyway?”
In the intervening decades since my teenage guitar beginnings the internet had happened, so while then I was frustrated by fusty music textbooks, now Wikipedia, immediately to hand on my phone, provided a clear initial answer to my ‘what is a mode question’, followed soon after by a brilliant set of blog posts by Ethan Hein, a music professor at NYU. His clear explanations of how scales are constructed from the 12 chromatic tones by selecting certain intervals, and how chords are then constructed from scales, and especially how he relates modes to different well known songs, opened up a whole new musical world for me. I was also intrigued by his use of the circle-of-fifths which led me to look for interactive online versions. I found Rand Scullard’s excellent visualisation a great inspiration. At the same time in my professional work as a software developer I’d become very excited by the possibilities of SVG for interactive browser based visualisations and realised that Rand’s circle-of-fifths, which he’d created by showing and hiding various pre-created PNG images, would be very easy to reproduce with SVG, and that I could drive it from an algorithmic music engine implemented from the theory that Ethan Hein had taught me. The flexibility offered by factoring out the music generation from the display also meant that I could easily add new visualisations, the obvious one being a guitar fretboard.
My first version was pretty awful. Driven by the hubris of the novice, I’d not really understood the subtleties of note or interval naming and my scales sometimes had duplicate note names amongst other horrors. I had to revisit the music algorithm a few times before I realised that intervals are the core of the matter and the note names come out quite easily once the intervals are correct. The algorithmic approach paid off though; it was very easy to add alternative tunings and instruments to the fretboard since it was simply a case of specifying a different set of starting notes for each string, and any number of strings. Flipping the nut and providing a left-handed fretboard were similarly straightforward. I more recently added non-diatonic scales (access them via the ‘Scale’ menu). This also came out quite easily since the interval specification for the original diatonic scale is simply a twelve element Boolean array. Unfortunately the note naming issue appears again, especially for non-seven-note-scales. Moving forward, it should be relatively easy to add a piano keyboard display, or perhaps, to slay an old demon, a musical stave that would also display the selected notes.
For an introduction to Guitar Dashboard, I’ve created a video tour:
So that’s Guitar Dashboard and my motivation for creating it. Now a brief discussion of some of the things I’ve learnt. First some technical notes about SVG and TypeScript, and then some reflections on music theory.
The awesome power of SVG.
The visual display of Guitar Dashboard is implemented using SVG.
SVG (Scalable Vector Graphics) is an “XML-based vector image format for two-dimensional graphics with support for interactivity and animation.” (Wikipedia). All modern browsers support it. You can think of it as the HMTL of vector graphics. The most common use case for SVG is simple graphics and graphs, but it really shines when you introduce animation and interactivity. Have a look at these blog posts to see some excellent examples.
I was already a big fan of SVG before I started work on Guitar Dashboard and the experience of creating it has only made me even more enamoured. The ability to programmatically build graphical interactive UIs or dashboards is SVG’s strongest, but most underappreciated asset. It’s gives the programmer, or designer, far more flexibility than image based manipulation or HTML and CSS. The most fine grained graphical elements can respond to mouse events and be animated. I used the excellent D3js library as an interface to the SVG elements but I do wonder sometimes whether it was an appropriate choice. As a way of mapping data sets to graphical elements, it’s wonderful, but I did find myself fighting it to a certain extent. Guitar Dashboard is effectively a data generator (the music algorithm) and some graphs (the circles and the fretboard), but the graphs are so unlike most D3js applications, that it’s possible I would have been better off just manipulating the raw SVG or developing my own targeted library.
Another strength of SVG is the tooling available to manipulate it. Not only is it browser native, which also means that it’s easy to print and screen-shot, but there are also powerful tools, such as the open source vector drawing tool, Inkscape that make it easy to create and modify SVG documents. One enhancement that I’m keen to include in Guitar Dashboard is a ‘download’ facility that will allow the user to download the currently rendered SVG as a file that can be opened and modified in Inkscape or similar tools. Imagine if you want to illustrate a music theory article, or guitar lesson, it would be easy to select what you want to see in Guitar Dashboard, download the SVG and then edit it at will. You could easily just cut out the fretboard, or the circle-of-fifths, if that’s all you needed. You could colour and annotate the diagrams in any way you wanted. Because SVG is a vector graphics format, you can blow up an SVG diagram to any size without rasterization. You could print a billboard with a Guitar Dashboard graphic and it would be completely sharp. This makes it an excellent choice for printed materials such as textbooks.
TypeScript makes large browser based applications easy.
Creating Guitar Dashboard was my first experience of writing anything serious in TypeScript. I’ve written plenty of Javascript during my career, but I’ve always found it a rather unhappy experience and I’ve always been relieved to return to the powerful static type system of my main professional language C#. I’ve experimented with Haskell and Rust which both have even stronger type systems and the experience with Haskell of '”if it compiles it will run” is enough to make anyone who might have doubted the power of types a convert. I’ve never understood the love for dynamic languages. Maybe for a beginner, the learning curve of an explicit type system seems quite daunting, but for anything but the simplest application, its lack means introducing a whole class of bugs and confusion that simply don’t exist for a statically typed language. Sure you can write a million unit tests to ensure you get what you think you should get, but why have that overhead?
Typescript allows you to confidently create large scale browser based applications. I found it excellent for making Guitar Dashboard. I’m not sure I am writing particularly good Typescript code though. I soon settled into basing everything around interfaces, enjoying the notion of structural rather than nominal typing. I didn’t use much in the way of composition and there’s no dependency injection. Decoupling is achieved with a little home made event bus:
    export class Bus<T> {
        private listeners: Array<(x:T)=>void> = [];
        private name: string;

        constructor(name: string) {
            this.name = name;
        }

        public subscribe(listener: (x:T)=>void): void {
            this.listeners.push(listener);
        }

        public publish(event: T): void {
            //console.log("Published event: '" + this.name + "'")
            for (let listener of this.listeners) {
                listener(event);
            }
        }
    }
A simple event bus, is just a device to decouple code that wants to inform that something has happened from code that wants to know when it does. It’s a simple collection of functions that get invoked every time an event is published. The core motivation is to prevent event producers and consumers from having to know about each other. There’s one instance of Bus for each event type.
Each of the main graphical elements is its own namespace which I treated like stand alone modules. Each of which subscribe to and raise typed events via a Bus instance. I only created classes when there was an obvious need, such as the Bus class above and the NoteCircle class which has two instances, the chromatic-circle and circle of fifths. I didn’t write any unit tests either, although now I think the music module algorithm is complex enough that it’s really crying out for them. Guitar Dashboard is open source, so you can see for yourself what you think of my Typescript by checking it out on GitHub.
Another advantage of TypeScript is the excellent tooling available. I used VS Code which itself is written in TypeScript and which supports it out-of-the-box. The fact that VS Code has been widely adopted outside of the Microsoft ecosystem is a testament to its quality as a code editor. It came top in the most recent Stack Overflow developer survey. I’ve even started experimenting with using it for writing C# and it’s a pretty good experience.
What I learnt about music.
Music is weird. Our ears are like a serial port into our brain. With sound waves we can reach into our cerebral cortex and tweak our emotions or tickle our pleasure senses. A piece of music can take you on a journey, but one which bares no resemblance to concrete reality. Music defines human cultures and can make and break friendships; people feel that strongly about it. But fundamentally it’s just sound waves. It greatly confuses evolutionary psychologists. What possible survival advantage does it confer? Maybe it’s the human equivalent of the peacock’s tail; a form of impressive display; a marker of attendant mental agility and fitness? Who knows. What is true is that we devote huge resources to the production and consumption of music: the hundreds of thousands of performers; the huge marketing operations of the record companies; the global business of producing and selling musical instruments and the kit to record it and play it back. The biggest company in the world, Apple, got its second wind from a music playback device and musical performers are amongst the most popular celebrities.
But why do our brains favour some forms of sound over others? What makes a melody, a harmony, a rhythm, more or less attractive to us? I recently read a very good book on this subject, The Music Instinct by Philip Ball. The bottom line is that we have no idea why music affects us like it does, but that’s unsurprising given that the human brain is still very much a black box to science. It does show, however, that across human cultures there are some commonalities: rhythm, the recognition of the octave, where we perceive two notes an octave apart as being the same note, and also something close to the fifth and the third. It’s also true that music is about ratios between frequencies rather than the frequencies themselves, with perhaps the exception of people with perfect pitch. The more finely grained the intervals become, the more cultures diverge, and it’s probably safe to say that the western twelve tone chromatic scale with its ‘twelfth root of two’ ratio is very much a technical innovation to aid modulation rather than something innate to the human brain. Regardless of how much is cultural or innate, the western musical tradition is very much globally dominant. Indeed, it’s hard buy a musical instrument that isn’t locked down to the twelve note chromatic scale.

However, despite having evolved a very neat, mathematical and logical theory, western music suffers from a common problem that bedevils any school of thought that’s evolved over centuries, a complex and difficult vocabulary and a notation that obfuscates rather than reveals the structure of what it represents. Using traditional notation to understand music theory is like doing maths with Roman numerals. In writing the music engine of guitar dashboard, by far the most difficult challenges have been outputting the correct names for notes and intervals.
This is a shame, because the fundamentals are really simple. I will now explain western music theory in four steps:
- Our brains interpret frequencies an octave apart as the same ‘note’, so we only need to care about the space between n and 2n frequencies.
- Construct a ratio such that applying the ratio to n twelve times gives 2n. Maths tells you that this must be the 12th root of 2. (first described by Simon Stevin in 1580). Each step is called a semitone.
- Start at any of the twelve resulting notes and jump up or down in steps of 7 semitones (traditionally called a 5th) until you have a total of 7 tones/notes. Note that we only care about n to 2n, so going up two sets of 7 semitones (or two 5ths) is the same as going up 2 semitones (a tone) (2 x 7 – 12 = 2. In music all calculations are mod 12). This is a diatonic scale. If you choose the frequency 440hz, jump down one 7-semitone step and up 5, you have an A major scale. Up two 7-semitone steps and down four gives you A minor. The other five modes (Lydian, Mixolydian, Dorian, Phrygian and Locrian) are just different numbers of up and down 7-semitone steps.
- Having constructed a scale, choose any note. Count 3 and 5 steps of the scale (the diatonic scale you just constructed, not the original 12 step chromatic scale) to give you three notes. This is a triad, a chord. Play these rhythmically in sequence while adding melody notes from the scale until you stumble across something pleasing.
That, in four simple steps, is how you make western music.
OK, that’s a simplification, and the most interesting music breaks the rules, but this simple system is the core of everything else you will learn. But try to find this in any music textbook and it simply isn’t there. Instead there is arcane language and confusing notation. I really believe that music education could be far simpler with a better language, notation and tools. Guitar Dashboard is an attempt to help people visualise this simplicity. Everything but the fretboard display is common to all musical instruments. It’s only aimed at guitarists because that’s what I play and it also helps that guitar is the second most popular musical instrument. The most poplar, piano, would be easy to add. Piano Dashboard anyone?
Wednesday, September 05, 2018
The Possibilities of Web MIDI With TypeScript
If you’ve ever had any experience with music technology, or more specifically sequencers, keyboards or synthesisers, you will have come across MIDI (Musical Instrument Digital Interface). It’s used to send note and controller messages from musical devices, such as keyboards or sequencers which are used to play and record music, and devices that produce sounds, such as samplers or synthesizers. It’s pure control information, for example, “play a c# in the 3rd octave with a velocity of 85”, there’s no actual audio involved. It dates back to the early 1980s, when a group of musical instrument manufacturers such as Roland, Sequential Circuits, Oberheim, Yamaha and Korg got together to define the standard. It soon lead to a huge boom in low cost music production and the genesis of new musical styles. It’s no accident that rap and electronic dance music date from the mid to late 80’s.
Web MIDI is a new W3C specification for an API to allow browser applications to access MIDI input and output devices on the host machine. You can enumerate the devices, then choose to listen for MIDI messages, or format and send your own messages. It’s designed to allow applications to consume and emit MIDI information at the protocol level, so you receive and send the actual raw message bytes rather the API providing the means to play MIDI files using General MIDI for example. Don’t let this put you off though, the protocol is very simple to interpret as I’ll demonstrate later.
The potential for a large new class of browser based musical applications is huge. The obvious examples are things like browser based sequencers and drum machines emitting MIDI messages and synthesizers and samplers on the consuming side using Web Audio, another interesting new standard. But it goes much wider than that, the MIDI protocol is ideally suited to any real-time parameter control. It’s already widely used for lighting rigs and special effects in theatrical productions for example. Also because it’s such an established standard, there is all kinds of cheaply available hardware controller interfaces full of knobs and buttons. If you’ve got any application that requires physical control outside the range of keyboard/mouse/trackpad, it might be a solution. Imagine a browser based application that allowed you to turn knobs on a cheap MIDI controller to tweak the parameters of a mathematical visualisation, or some network based industrial controller, or even as new input for browser based games. The possibilities are endless.

I’m going to show a simple TypeScript example. I’m currently working on a TypeScript application that consumes MIDI and I couldn’t find much good example code so I’m hoping this might help. I’m using the type definitions from here: https://www.npmjs.com/package/@types/webmidi.
The entry point into the new API is a new method on navigator, requestMIDIAccess. This returns a Promise<MIDIAccess> that you can use to enumerate the input and output devices on the system. Here I’m just looking for input devices:
window.navigator.requestMIDIAccess()
    .then((midiAccess) => {
        console.log("MIDI Ready!");
        for(let entry of midiAccess.inputs) {
            console.log("MIDI input device: " + entry[1].id)
            entry[1].onmidimessage = onMidiMessage;
        }
    })
    .catch((error) => {
        console.log("Error accessing MIDI devices: " + error);
    });
I’ve bound my onMidiMessage function to the onmidimessage event on every input device. This is the simplest possible scenario, it would be better to provide an option to your user to choose the device they want to use. This allows us to process MIDI events as they arrive from MIDI devices.
MIDI events arrive as byte arrays with a length of 1 to 3 bytes. The first byte is always the ‘status’ byte. The four most significant bits are the status type. Here we’re only concerned with note on (9) and off (8) messages. The four least significant bytes tell us the MIDI channel. This allows up to 16 different devices, or voices to be controlled by a single controller device. If you ignore the channel, as we’re doing here, it’s known as OMNI mode. For note on/off messages, the second byte is the note number and the third is the velocity, or how loud we want the note to sound. The note number describes the frequency of the note using the classical western chromatic scale; good luck if you want to make Gamelan dance music! The notes go from C0 (around 8hz) to G11 (approx 12543hz). This is much wider than a grand piano keyboard and sufficient for the vast majority of applications. See the code for how to convert the note number to name and octave. See this page and the Wikipedia page for more details.
In this example we filter for on/off messages, then write the channel, note name, command type and velocity to the console:
let noteNames: string[] = ["C", "C#", "D", "D#", "E", "F", "F#", "G", "G#", "A", "A#", "B"];

function onMidiMessage(midiEvent: WebMidi.MIDIMessageEvent): void {
    let data: Uint8Array = midiEvent.data;
    if(data.length === 3) {
        // status is the first byte.
        let status = data[0];
        // command is the four most significant bits of the status byte.
        let command = status >>> 4;
        // channel 0-15 is the lower four bits.
        let channel = status & 0xF;

        console.log(`$Command: ${command.toString(16)}, Channel: ${channel.toString(16)}`);

        // just look at note on and note off messages.
        if(command === 0x9 || command === 0x8) {
            // note number is the second byte.
            let note = data[1];
            // velocity is the thrid byte.
            let velocity = data[2];

            let commandName = command === 0x9 ? "Note On " : "Note Off";

            // calculate octave and note name.
            let octave = Math.trunc(note / 12);
            let noteName = noteNames[note % 12];

            console.log(`${commandName} ${noteName}${octave} ${velocity}`);
        }
    }
}
Here’s the output. I’m using Vmpk (Virtual MIDI Piano Keyboard) to play the notes. You’ll also need a MIDI loopback device such as loopMIDI if you want to connect software devices, but it should be plug and play with a hardware controller:

So there we have it. MIDI is now very easy to integrate into a browser based application. I’ve demonstrated this with just a few lines of code. It opens up possibilities for a new class of software and not for just musical applications. It’s going to be very interesting to see what people do with it.
Thursday, January 18, 2018
Configure AsmSpy as an external tool in Visual Studio
AsmSpy is a tool I wrote a few years ago to view assembly version conflicts. Despite the fact that it started as a single page of code command line application, it’s been one of my more successful open source efforts. I still use it all the time, especially now with the ‘forking’ of .NET into Framework and Core and spreading use of dotnet standard, both good things IMHO, but not without the occasional assembly version head scratcher.
Today I want to show how easy it is to integrate AsmSpy into Visual Studio as an ‘external tool’.
First download AsmSpy from the GitHub repository. If you download the zip file, you’ll see that it’s merely a stand alone exe that you can run from the command line.
In VS select External Tools from the ‘Tools’ menu.

Now configure AsmSpy as follows:
Title: AsmSpy
Command: The path to where you’ve put the AsmSpy.exe file.
Arguments: $(BinDir) - this points AsmSpy at the output directory of the currently selected project.
Initial Directory: $(ProjectDir)
Use Output Window: checked. – this ensures that the output from AsmSpy will go to Visual Studio’s output window.

Now you can select a project in Solution Explorer and go to Tools –> AsmSpy. AsmSpy will run against the build output of your project and you can view Assembly version conflicts in the Visual Studio output window.
Subscribe to:
Posts (Atom)

